How to Create a Yearbook Ad
 GETTING STARTED
1. Go to www.yearbookordercenter.com
2. Enter your school’s order number: 7087.
3. Verify that it says De La Salle High School CONCORD, CA #7087-2017 - Click Continue.
4. On the center of the page, click Buy a Yearbook Ad (looks like the image to the left).
5. Choose your ad size/type (Click Yearbook Ad Template Configurations for an additional guide to template size options).
6. Select your size > click Buy Ad for Student (not Business) and proceed to search for your student’s name. If he isn't listed, you may add him to the list.
7. Once you load your cart, click Next (on the right side of the page) to start creating your ad.
8. Log in with your credentials or create a new account.
CREATE
- Once logged in, choose a template for your student’s ad. The template will open in the product design area where you can begin creating the ad.
BACKGROUND
- All backgrounds will be in white.
STUDENT NAME
- Insert your student’s name by selecting "Student Name."
- Change the font type, color, size, and other specifics by using the controls to the left of the template.
- Use the arrow controls or the hand button to move your student's name around the template.
MESSAGE
- Insert your own personalized text by selecting "MESSAGE BOX."
- Change the font, color, size and other specifics by using the controls to the left of the template.
- Use the arrow controls or the hand button to move your message around on the template.
- Change the size of the text box, if you want, by clicking and dragging the anchors around the text box.
YOUR PHOTOS
- Click Upload New Image > Upload Files > Choose your images
- Your photos will show up to the left under the Your Photos tab.
- To place images on the ad, drag and drop them to the photo boxes indicated.
- Use the controls to the left to resize, rotate, move or flip an image.
- Use the arrow controls or the hand button to move the photos around on the template.
** Auto-save will occur every 5 minutes while you are working. Remember to click SAVE MY WORK often so as not to lose any changes made. You can resume editing at any time.**
Review
- When your ad is complete, click Continue > View Proof > Make sure your ad is EXACTLY how you want it — check spelling, photos, etc.
- If your ad needs further edits, click the orange edit button.
- To proof and checkout later, click Finish Later. You will receive an email that will provide an easy link back to your ad.
- If you are satisfied with your ad, type your initials in the box provided and click Add to Cart.
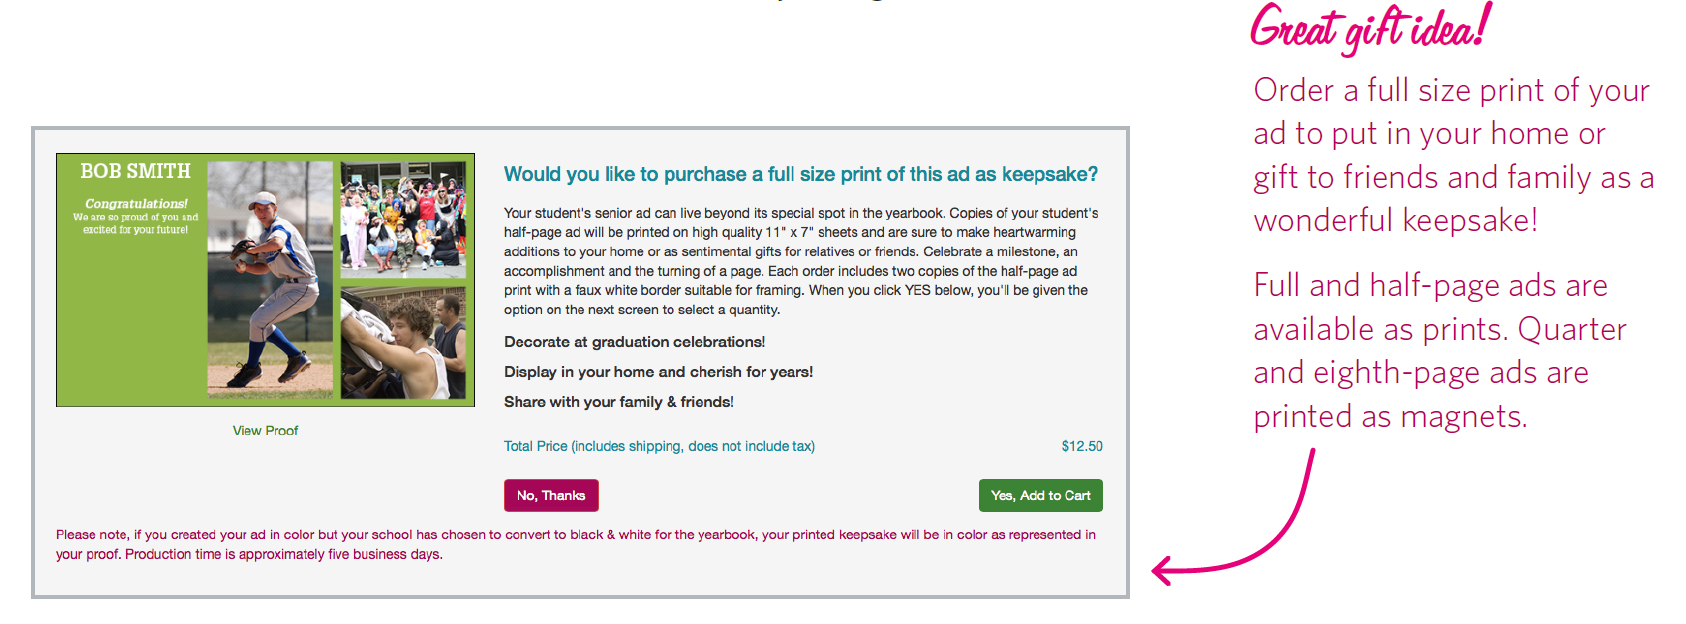
- You will be given the option to purchase a print copy of the ad; choose whether or not you want to do this > No Thanks OR Yes Add to Cart.
cHECKOUT
- Review your shopping cart. If you are satisfied and ready to check out, click Checkout.
- Fill in all the requested information > Review Order
- When everything is correct, click Complete Order. You will receive a confirmation email that will include a receipt.
